Use Let's Encrypt with KeyCDN to Enable TLS
Let's Encrypt is a certificate issuing authority that allows users to issue SSL certificates free of charge. Let's Encrypt with KeyCDN gives customers a third option when securing their content vian SSL from the KeyCDN edge servers to their website's visitors.
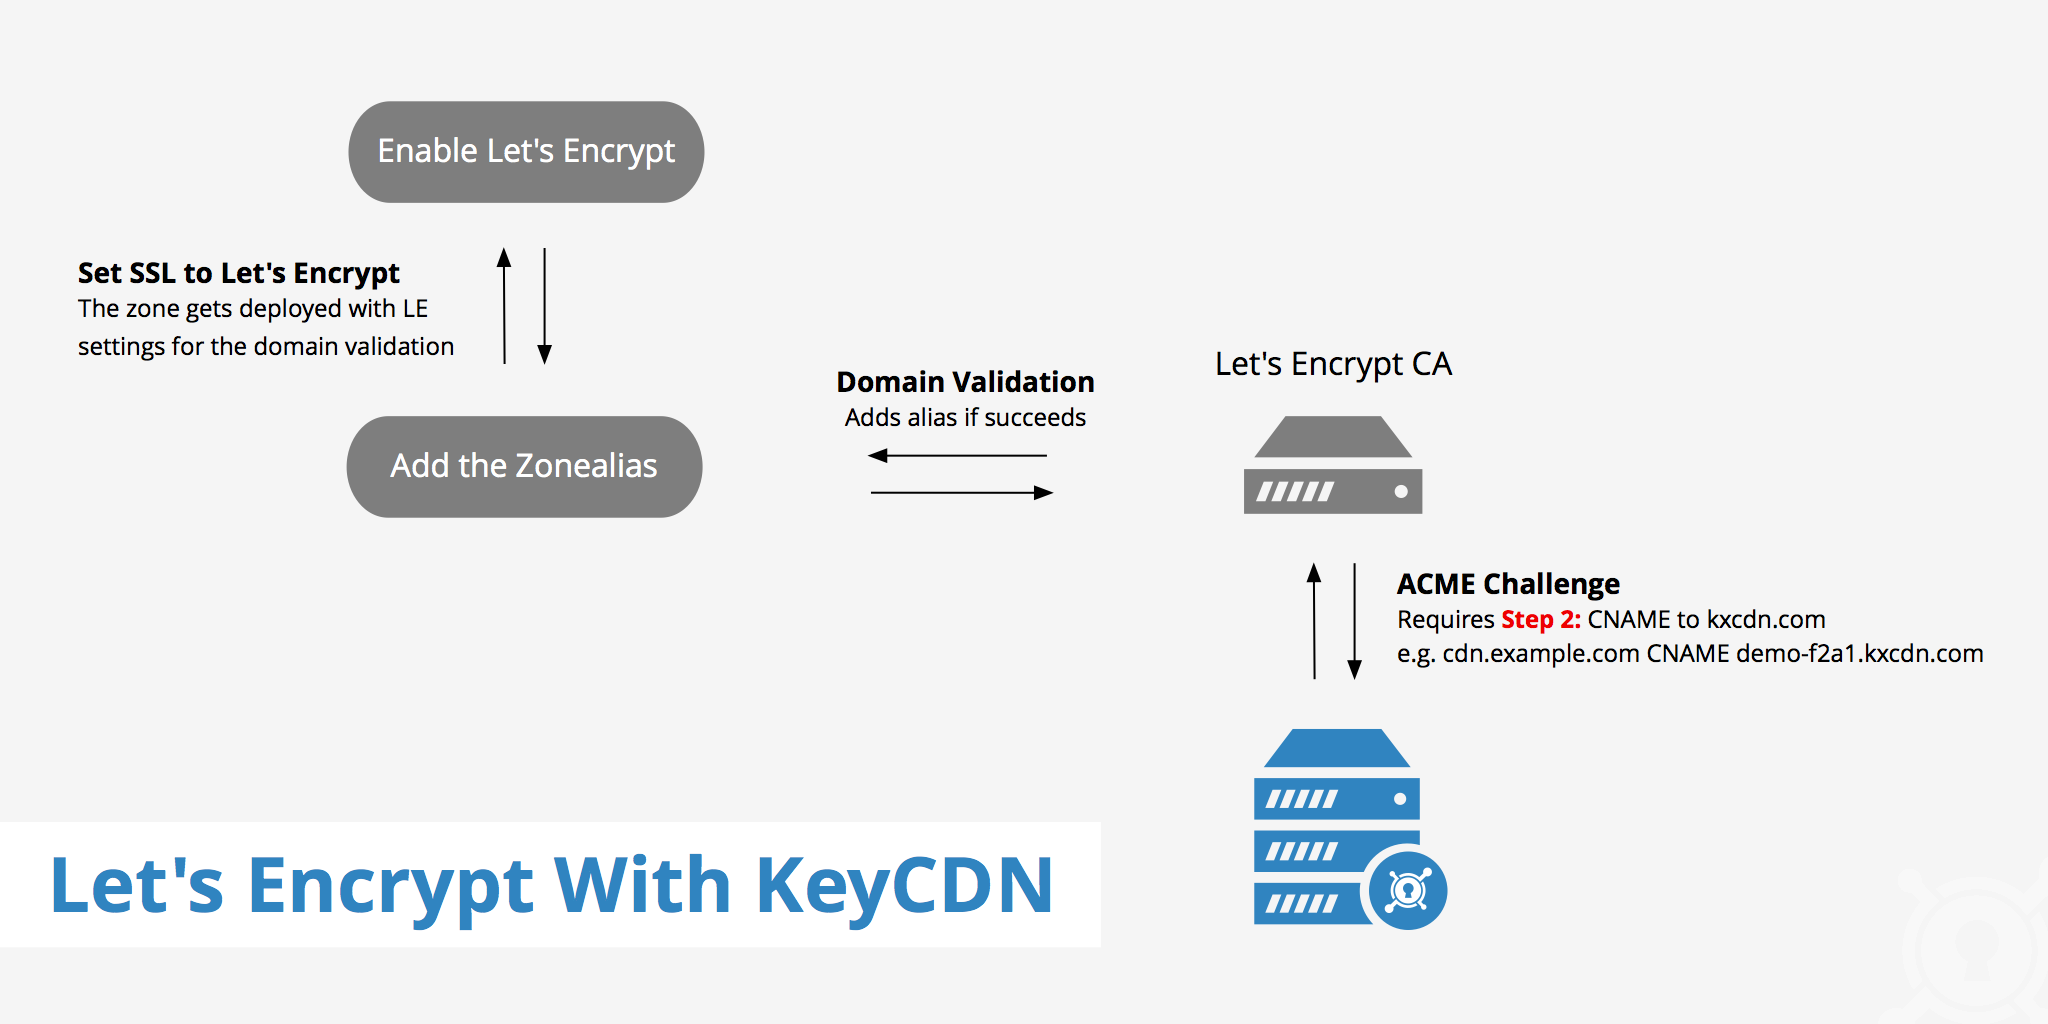
Let's Encrypt certificates require domain validation in order to properly succeed. To satisfy this validation, the ACME challenge must be passed, which requires you to CNAME your custom CDN URL (e.g. cdn.example.com) to the Zone URL (e.g. example-hexid.kxcdn.com). This is why you must first create the CNAME record and then add your Zone Alias once the DNS record has fully propagated for successful domain validation.
When using our Let's Encrypt SSL option, there is no need to worry about any certificate and private key information as all of this happens automatically once LE is chosen. Follow the steps below to setup Let's Encrypt SSL with your KeyCDN Zone.
How to use Let's Encrypt with KeyCDN
Using Let's Encrypt with KeyCDN is simple and can be done in just a few steps.
- Log in to the KeyCDN dashboard.
- In the left navigation sidebar click Zones.
- In the Zones table click the Zone menu that you want add a Let's Encrypt certificate to and click Edit.
- Update the SSL setting to
letsencrypt. - Create a Zone Alias.
- Allow up to 5-10 minutes for the newly issued Let's Encrypt certificate to be deployed globally.
Once the above steps are completed you will have secured your website with SSL for content delivery between the KeyCDN edge servers and your end users.
Zero downtime migration to Let's Encrypt
If you currently have a custom SSL certificate configured but want to migrate to Let's Encrypt without any downtime, then you must follow these steps:
- Create a Pull Zone and Zone Alias with a custom SSL certificate.
- After the changes are fully deployed (approximately 5-10 minutes), change the CNAME accordingly (if not already done).
- Update the SSL setting to
letsencryptand allow the Zone to fully redeploy (approximately 5-10 minutes). - Save the Zone Alias again (this will issue the Let's Encrypt certificate and attach it to the Zone).
That's it! Now your KeyCDN Zone is using Let's Encrypt to deliver your assets over HTTPS. This means that you no longer need to purchase custom SSL certificates for your CDN assets nor do you need to update the certificates once they expire. Let's Encrypt does this automatically and is completely free.
Other considerations
- An important Let's Encrypt limitation is 20 certificates for a registered domain per week. Check out Let's Encrypt's complete rate limits post for more details.
- Let's Encrypt also publicly discloses the certificates they issue with the goal of increasing certificate transparency. This helps eliminate flaws of the SSL certificate system that can weaken the reliability of SSL encrypted connections. Certificates issued by Let's Encrypt can be identified by using the CA Search tool.
- Upon enabling Let's Encrypt SSL, delivering assets vian SSL using the kxcdn domain is no longer possible and will return an error.
- Let's Encrypt certificates compatibility: compatibility list