Setting up an Nginx Reverse Proxy
If you're looking for a way to improve the performance and security of your web applications, setting up an Nginx reverse proxy may be just what you need. With a reverse proxy, you can improve your website's speed, reliability, and scalability by distributing traffic across multiple servers and implementing caching and other optimization techniques. In this article, we'll guide you through the process of setting up an Nginx reverse proxy, from installation to configuration, so that you can take advantage of the benefits it has to offer.
What is a reverse proxy?
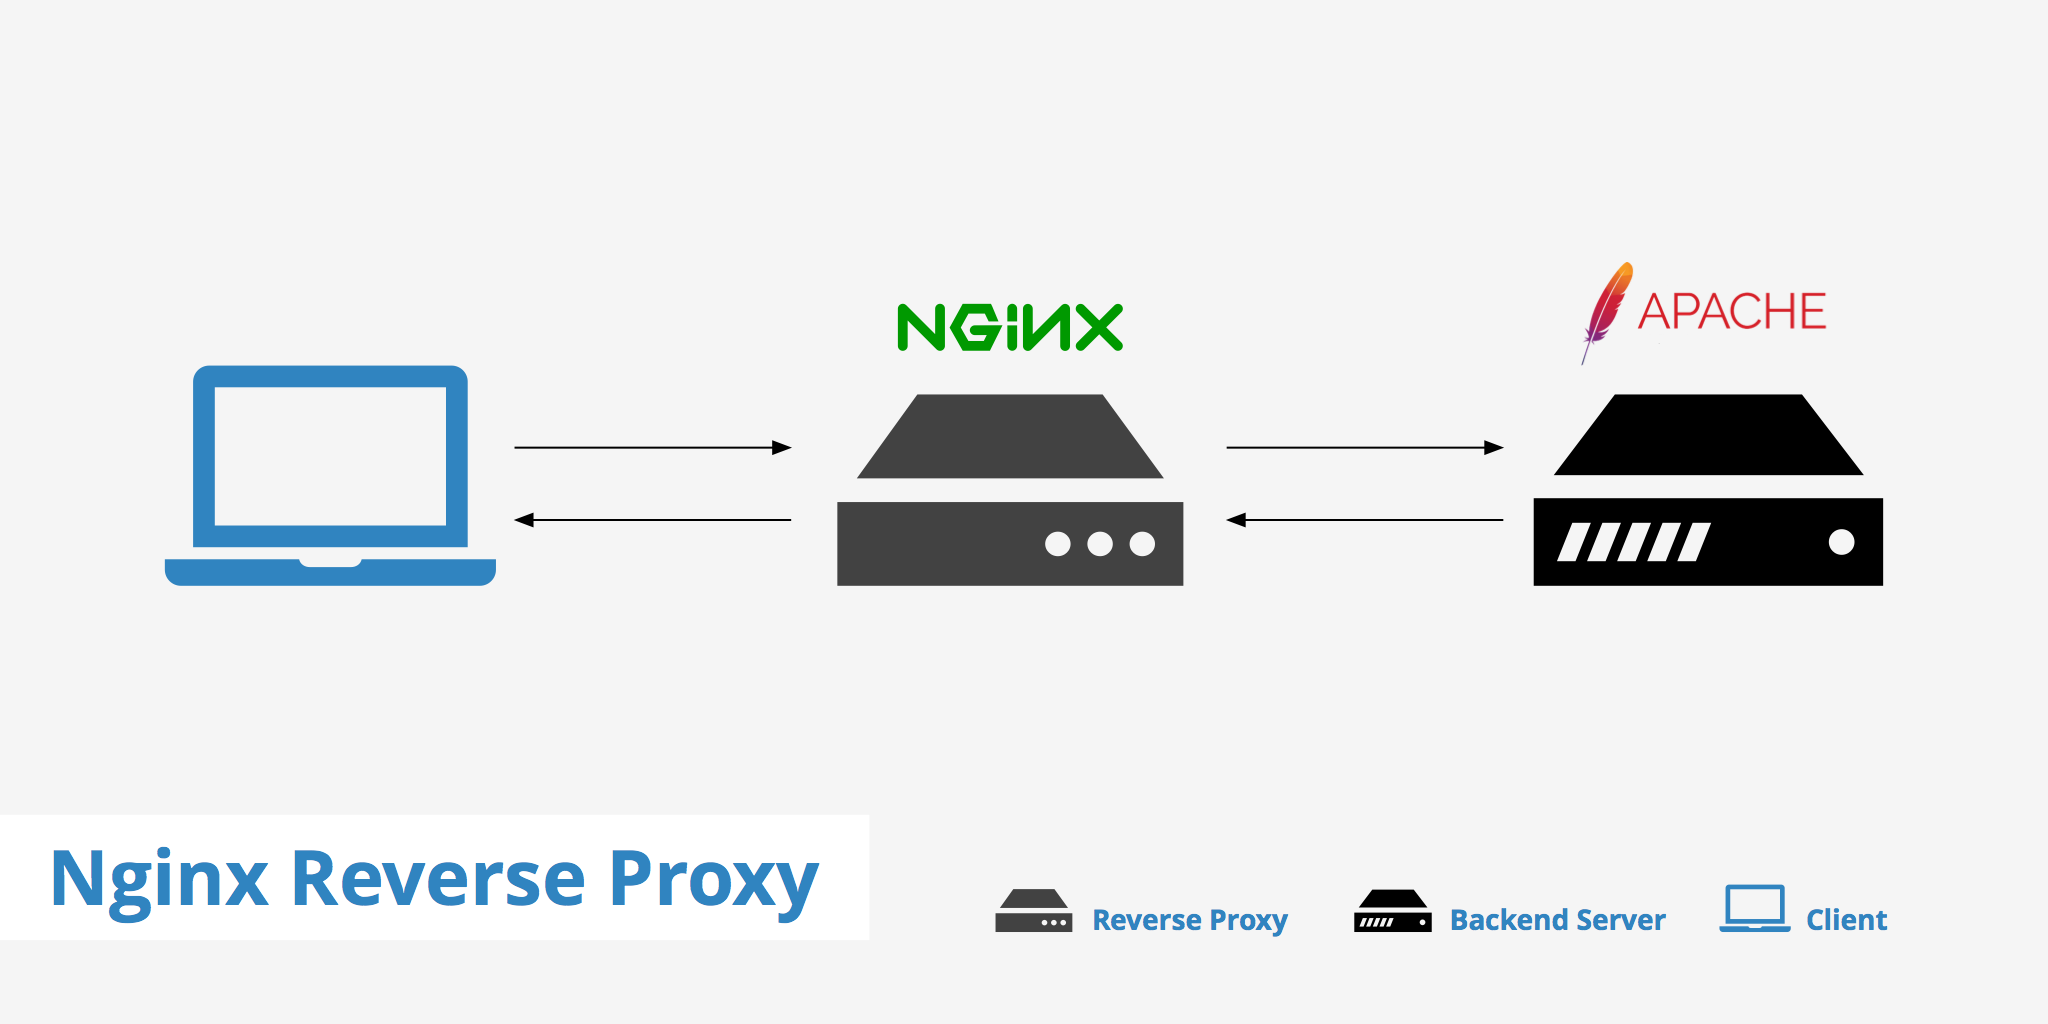
Before we dive into the specifics of Nginx, let's start with the basics. A reverse proxy is an intermediary proxy service that takes a client request, passes it on to one or more servers, and subsequently delivers the server's response to the client. A common reverse proxy configuring is to put Nginx in front of an Apache web server. Using this method will allow both web servers to work together enabling each to do what they do best. Learn more about the differences between Nginx vs Apache.
This post will outline the benefits of using an Nginx reverse proxy as well as how to configure one.
Benefits of an Nginx reverse proxy
There are a few benefits to setting up an Nginx reverse proxy. Although not required in all cases, it can be beneficial depending on your particular scenario/setup. The following outlines a few benefits of implementing a reverse proxy.
- Load balancing - A reverse proxy can perform load balancing which helps distribute client requests evenly across backend servers. This process greatly helps in avoiding the scenario where a particular server becomes overloaded due to a sudden spike in requests. Load balancing also improves redundancy as if one server goes down, the reverse proxy will simply reroute requests to a different server. Read our complete article to learn more about load balancing.
- Increased security - A reverse proxy also acts as a line of defense for your backend servers. Configuring a reverse proxy ensures that the identity of your backend servers remains unknown. This can greatly help in protecting your servers from attacks such as DDoS for example.
- Better performance - Nginx has been known to perform better in delivering static content over Apache. Therefore with an Nginx reverse proxy, all client requests can be handled by Nginx while all requests for dynamic content can be passed on to the backend Apache server. This helps improve performance by optimizing the delivery of assets based on their type. Additionally, reverse proxies can also be used to serve cached content and perform SSL encryption to take a load off the web server(s).
- Easy logging and auditing - Since there is only one single point of access when a reverse proxy is implemented, this makes logging and auditing much simpler. Using this method, you can easily monitor what goes in and out through the reverse proxy.
How to setup an Nginx reverse proxy
Now that we've covered the benefits of setting up a reverse proxy, we'll go through a simple example of how to configure an Nginx reverse proxy in front of an Apache web server.
We'll define the IP address of the Nginx reverse proxy to be 192.x.x.1 and the backend Apache server to be 192.x.x.2. In the following example, we assume that Apache is already installed and configured.
Step 1: Install Nginx
The first step is to install Nginx. If you're using a Linux-based operating system, you can install Nginx using your package manager. To install Nginx the following command must be executed (remember to use sudo if you aren't logged in as root).
apt-get update
apt-get install nginx
Step 2: Disable the default virtual host
Once Nginx has been installed, the next step is to disable the default virtual host.
unlink /etc/nginx/sites-enabled/default
Step 2: Configure Nginx as a reverse proxy
Next, you'll need to configure Nginx as a reverse proxy. This involves creating an Nginx configuration file and specifying the location of the origin server.
Therefore, we need to create a file within the /etc/nginx/sites-available directory that contains the reverse proxy information. We can name this reverse-proxy.conf for example.
server {
    listen 80;
    location / {
        proxy_pass http://192.x.x.2;
    }
}
The above snippet is quite minimalistic and straightforward. Let's break down what's happening in this configuration file:
- The
listendirective specifies the port that Nginx should listen on. In this case, we're listening on port 80 (the default HTTP port). - The
locationdirective specifies the URL path that should be proxied. In this case, we're proxying the root path (/). - The important part here is the
proxy_passdirective which is essentially telling any requests coming through the Nginx reverse proxy to be passed along to the Apache remote socket192.x.x.2:80.
There are many other proxy configurations you can define within your Nginx configuration settings. To learn more about the directives available, check out the Nginx proxy module documentation.
Once you've added the appropriate directives to your .conf file, activate it by linking to /sites-enabled/ using the following command.
ln -s /etc/nginx/sites-available/reverse-proxy.conf /etc/nginx/sites-enabled/reverse-proxy.conf
Step 3: Test the configuration
Lastly, run an Nginx configuration test and restart Nginx.
service nginx configtest
service nginx restart
Step 4: Test the reverse proxy
To test the reverse proxy, you can open a web browser and navigate to your domain name. You should see the content of the origin server being served through Nginx.
Congratulations! You've successfully set up an Nginx reverse proxy.
Additional Configuration Options
There are many additional configuration options that you can use to customize your Nginx reverse proxy. Here are a few examples:
SSL/TLS
You can configure Nginx to terminate SSL/TLS connections and communicate with the origin server over HTTP. This can reduce the computational load on the origin server and improve page load times. Here's an example configuration file that does this:
server {
    listen 443 ssl;
    server_name example.com;

    ssl_certificate /path/to/cert.pem;
    ssl_certificate_key /path/to/key.pem;

    location / {
        proxy_pass http://localhost:8080;
        proxy_set_header Host $host;
        proxy_set_header X-Real-IP $remote_addr;
    }
}
Load balancing
You can configure Nginx to distribute traffic across multiple servers. Here's an example configuration file that does this:
upstream app_servers {
    server 10.0.0.1;
    server 10.0.0.2;
    server 10.0.0.3;
}

server {
    listen 80;
    server_name example.com;

    location / {
        proxy_pass http://app_servers;
        proxy_set_header Host $host;
        proxy_set_header X-Real-IP $remote_addr;
    }
}
Caching
You can configure Nginx to cache static content, reducing the load on the origin server and improving page load times. Here's an example configuration file that does this:
proxy_cache_path /var/cache/nginx levels=1:2 keys_zone=static_cache:10m inactive=60m;
proxy_cache_key "$scheme$request_method$host$request_uri";
proxy_cache_valid 200 60m;

server {
    listen 80;
    server_name example.com;

    location / {
        proxy_cache static_cache;
        proxy_cache_bypass $http_pragma;
        proxy_cache_revalidate on;
        proxy_pass http://localhost:8080;
Summary
There are various use cases where setting up a reverse proxy may come in handy. Although not required in all situations, it can prove to be quite effective in boosting performance and enhancing security. The configuration required for setting up a basic Nginx reverse proxy is quite simple. Although there are various other directives available depending upon your requirements, the above example should help in quickly getting started with a reverse proxy setup.