Full Site WordPress Acceleration
There are many ways to setup a WordPress CDN integration. You can use the CDN Enabler plugin to easily accelerate all of your static assets via the CDN URL or use a caching plugin that also has a CDN integration option. These methods will accelerate all of your static assets by rewriting the origin URL to use the CDN URL instead. However, all dynamic assets including your HTML will still be delivered from the origin server.
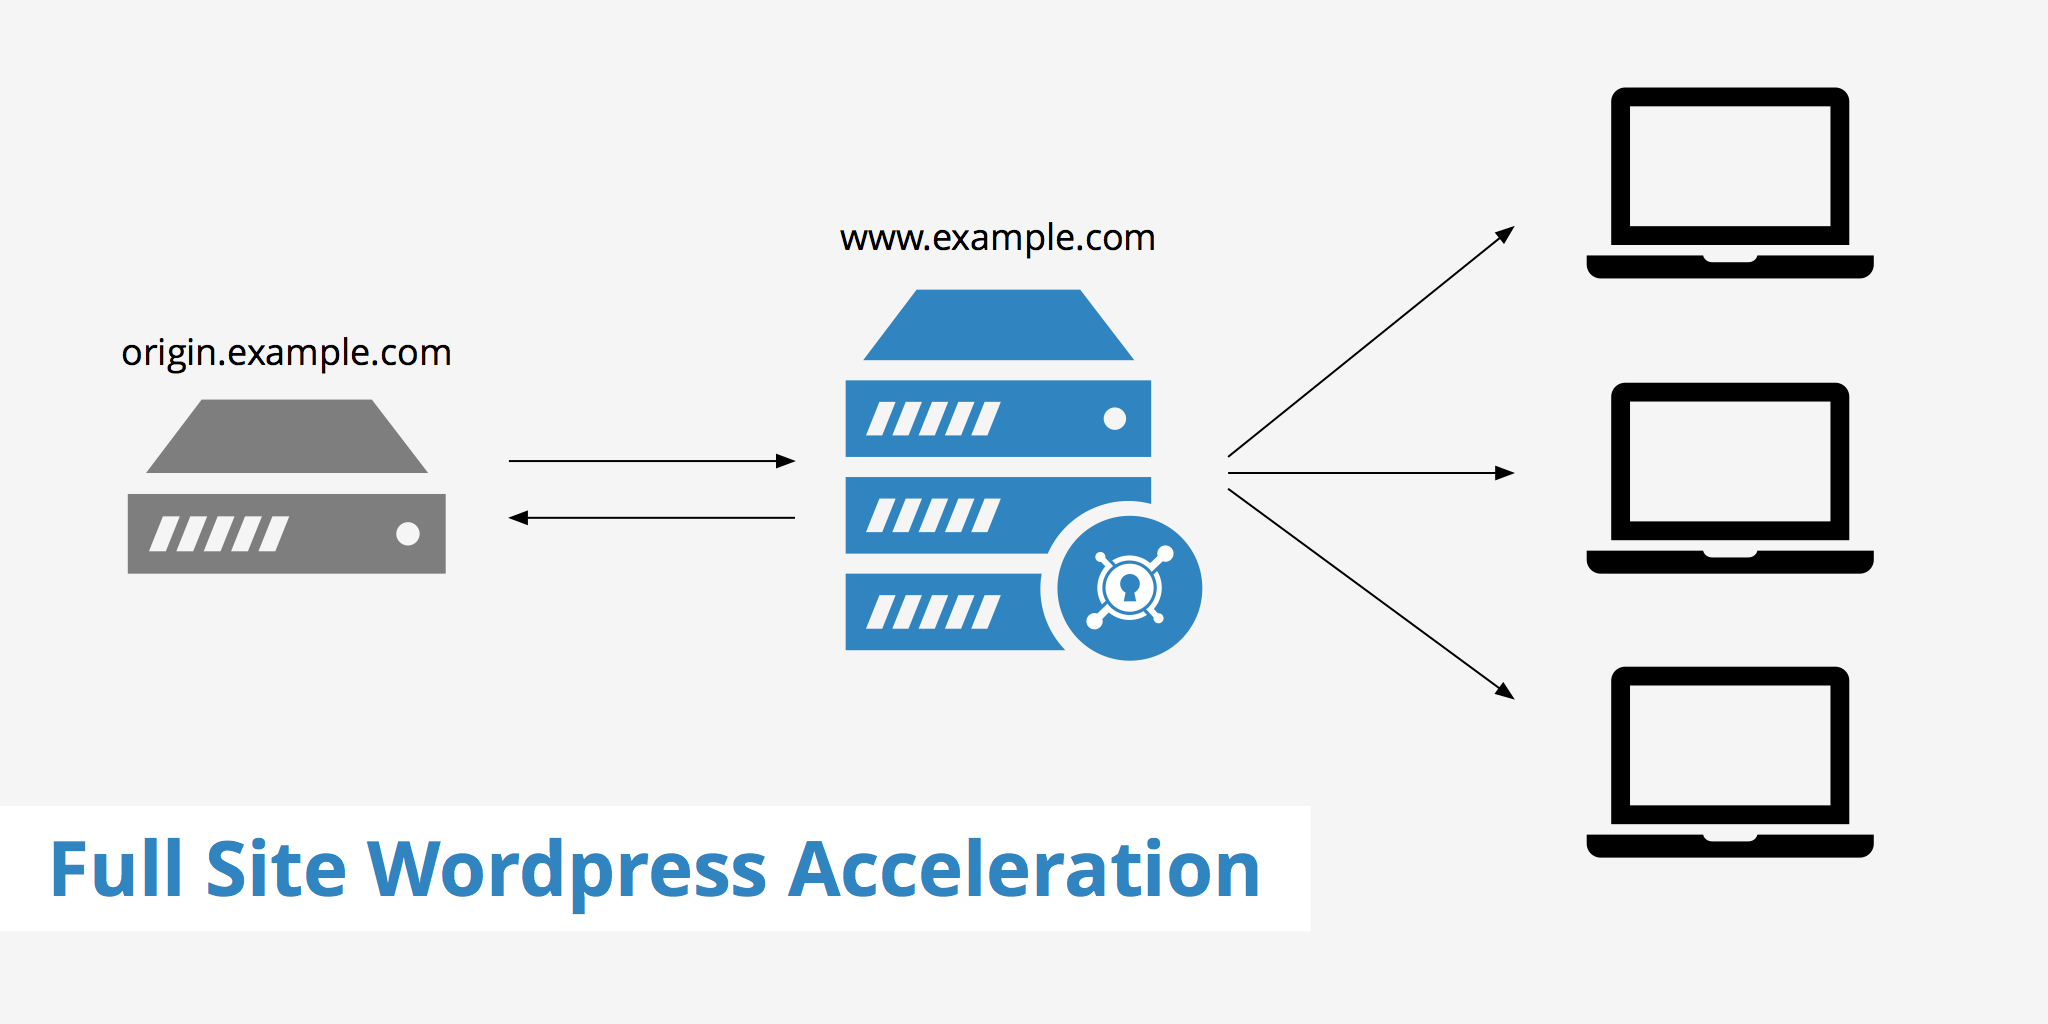
In this guide, we'll show you how to configure a full site WordPress acceleration with KeyCDN. This allows users to take full advantage of a CDN for their WordPress site by delivering all assets through the CDN for greater speeds, better security, and enhanced reliability.
Step 1 - Configuring Zone settings
The first step in a full site WordPress acceleration is to properly configure your Zone settings in the KeyCDN dashboard. First off, you'll need to define an Origin URL for your Pull Zone that is different from the URL you'll want to use for the full site acceleration. For example, if your site is currently accessible via www.example.com but you want that URL to be the one visitors access when accelerated though KeyCDN, you'll need to define a separate subdomain in your DNS settings such as: origin.example.com. This is required since your origin URL and KeyCDN Zone Alias cannot both be the same.
This may look similar to the following DNS record entry:
Next, navigate to the Zone settings. Here, you'll need to ensure that the following is properly configured:
- We must ensure that the origin server controls the cache. Therefore, we need to set the Expire setting to
0and Ignore Cache Control setting todisabled. - Next, we need to tell the CDN to ignore cookies. Set the Cache Cookies and Strip Cookies settings to
disabled. - Lastly, we also need to set the Ignore Query String setting to
disabled.
Step 2 - Configuring WordPress settings
The second step of a full site WordPress acceleration via KeyCDN involves configuring the WordPress settings. First, point the WordPress Address and Site Address URLs to the Zone you've set up. You are most likely going to use a Zone Alias so put that here.
In this setup, we strongly recommend using the Cache Enabler plugin to further improve WordPress caching. Whether you use Cache Enabler or another caching plugin, you need to ensure your PHP-generated content is cacheable to enable the CDN to serve the content without having to go back to your origin server.
Step 3 - Nginx config
In this step, we're going to make some configuration adjustments to the Nginx config file. These rules define when to bypass the cache as well as define Cache-Control values.
server {
    server_name origin.example.com;
    listen 80;

    root /var/www/example;
    index index.php index.html index.htm;

    set $cache_path $request_uri;

    # bypass cache for POST requests
    if ($request_method = POST) {
        set $cache_path 'nocache';
    }

    # don't cache login/admin URLs
    if ($request_uri ~* "/(wp-login.php|wp-admin|login.php|backend|admin)") {
        set $cache_path 'nocache';
    }

    # don't cache if there is a cookie called PHPSESSID
    if ($http_cookie ~* "PHPSESSID") {
        set $cache_path 'nocache';
    }

    # bypass cache for logged in users
    if ($http_cookie ~ (wp-postpass|wordpress_|comment_author)_) {
        set $cache_path 'nocache';
    }

    # bypass cache if query string not empty
    if ($query_string) {
        set $cache_path 'nocache';
    }

    location / {
        # this line is specific to Cache Enabler
        try_files /wp-content/cache/cache-enabler/${http_host}${cache_path}index.html $uri $uri/ /index.php?$args;

        if ($cache_path = 'nocache') {
            expires -1;
            add_header Cache-Control no-cache;
        }
    }

    # php7 fastcgi
    location ~ \.php$ {
        fastcgi_split_path_info ^(.+\.php)(/.+)$;
        fastcgi_pass unix:/run/php/php7.0-fpm.sock;
        fastcgi_index index.php;
        include fastcgi_params;
        ...

        fastcgi_intercept_errors on;

        if ($cache_path = 'nocache') {
            expires -1;
            add_header Cache-Control no-cache;
        }
        if ($cache_path != 'nocache') {
            expires +1h;
        }
    }

    # static assets
    location ~* \.(js|css|png|jpg|jpeg|gif|ico)$ {
        log_not_found off;

        add_header Cache-Control "max-age=604800, stale-while-revalidate=86400, stale-if-error=604800";
    }
}
Once the rules above have been added to your Nginx config file, save the changes and reload Nginx with: service nginx reload.
Step 4 - Using Forward Host Header
Depending on your origin hosting options or simply personal preference, you can choose to have the origin configured for the same server name as the CDN Zone - www.example.com in our example. This is done using KeyCDN's Forward Host Header feature.
When using Forward Host Header, the nginx configuration above would be changed like this:
server_name www.example.com;
Finally, we enable the Forward Host Header option on our Zone and wait for it to deploy.
Summary
If you're running a WordPress site on an Nginx web server and want to fully deliver your site through KeyCDN then following the four steps in this article will allow you to do so. Remember to properly define your WordPress Address and site URL as the Zone Alias you've defined in your Zone's settings. Additionally, ensure that you also define the correct protocol (e.g. HTTP or HTTPS) depending on your use case. To enable HTTPS for free and be able to deliver assets securely, check out our Let's Encrypt integration guide.